Warming Thawing Protocol
")
Materials
Vitrification Method Warming Kit
– Warming Solution (TS) :1 vial of 1.8mℓ
– Diluent Solution (DS) :1 vial of 0.5mℓ
– Washing Solution (WS) :1 vial of 1.0mℓ
– 1 Warming Plate with 4 wells
Microscope (Turn off the heating plate)
Stop watch (With count up function)
Tweezers
Micro pipette for 300μℓ
Preparation
Keep ES and VS vials at room temperature (25℃ to 27℃) for at least 2 hours before vitrification.
Warming (1 min)
1.- Take the TS vial out of the incubator, and expel all of the solution out of it into the TS well (1.8ml, Fig. 8, Step1/①)
2.- Quickly (within 1 sec) put the Vitrification method from liquid nitrogen into the TS well (Fig. 8, Step1/②). Start counting up by the stop watch for 1 min.
3.- The oocyte/embryo releases from the Vitrification method sheet by itself, and begins to float.
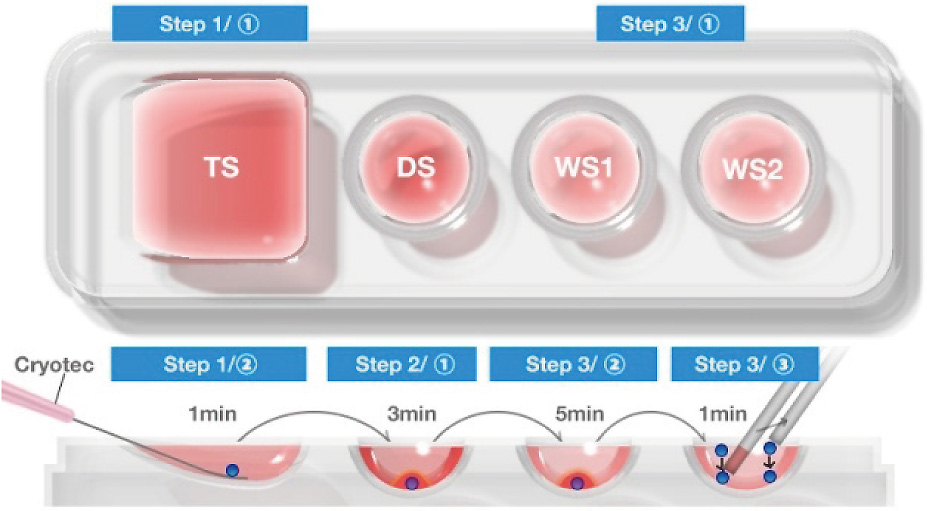
Figs. 8. Warming Procedure (Step 1-3)
Vitrification1 (30 - 40 sec)
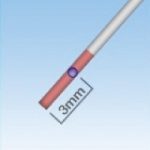
1.- Aspirate the oocyte/embryo first, followed by 3mm of the TS into the pipette (Fig. 9, 1).
2.- Introduce the TS to the bottom of the DS well (Fig. 9, 2), then expel the oocyte/embryo slowly to the bottom of TS layer in DS well (Fig. 9, 3), and wait for 3 min (Fig. 8, Step 2/①).
3.- While waiting, fill the WS1 and the WS2 well with 300μℓ each of ws Solution (Fig. 8, Step 3/①).

Step 1

Step 2

Step 3
Washing (5 min)
1.- Aspirate the oocyte/embryo followed by 3mm of the DS into the pipette (Fig. 10,1).
2.- Introduce the DS to the bottom of the WS1 (Fig. 10, 2), and expel the oocyte/embryo slowly to the bottom of the DS layer in WS1 well (Fig. 10.3). Observe the shape of the oocyte/embryo and memorize it. Turn off the light, and wait for more than 3 min.
3.- After 3 min, compare the shape of the oocyte/embryo to the one memorized. Give a survival judgment if the shrinkage of the oocyte is recovered.
4.- Wait for 5 min in total (Fig. 8, Step3/②).
Step 1

Step 2

Step 3
Washing 2 (1 min)
1.- Aspirate the oocyte/embryo with minimal volume of the WS1.
2.- Put the oocyte/embryo on the surface of the WS2 well (Fig. 8, Step3/③).
3.- After the oocyte/embryo sinks to the bottom, aspirate and place it on the surface of a different location with in W2. Put the oocyte/embryo into the droplet of the culture media until ICSI or ET is performed.
4.- (Two to four hours culture for ICSI, and 3 hours for blastocyst transfer are recommended)